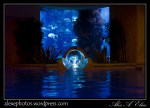
Photo of the day. Carved pumpkin picture.

Tonight when I walked into the house I noticed the carved pumpkin glowing on the table. I like the low light mood and decided to grave the camera and try to capture the scene the way I was looking at it. After trying a few different approaches, this is how I ended up doing it.

Canon 7D and Canon Ef 24-70 F2.8L on tripod. ISO 100 F5.6 and 1 second of exposure, and the color balance was set to tungsten.  To camera left I used a Canon 580EX with a full cut of CTO with a Pocket Wizard Flex TT5 on a 2’x2′ Lastolite Ezy box, that was triggered with a Pocket Wizard Mini TT1 and a an AC3 Pocket wizard module in manual mode dialed down to minus 3. The idea was to capture the overall scene with the ambient light and use the flash to show a bit around it.

Thanks for stopping by.

Alex Elias.

Advertisement

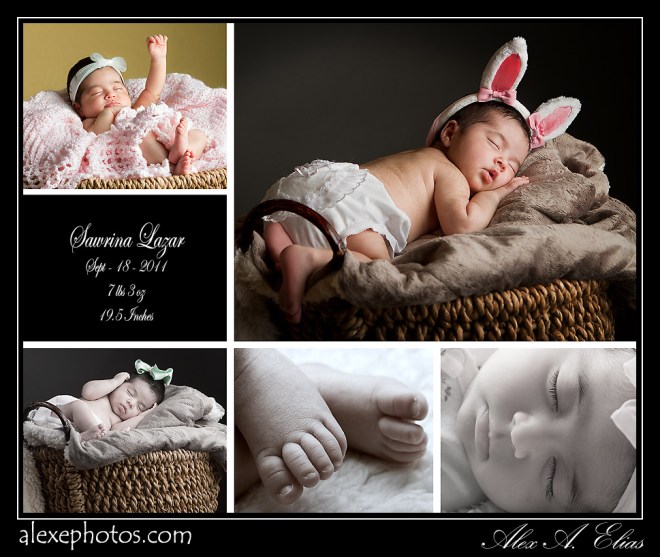
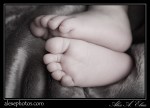
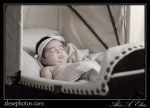
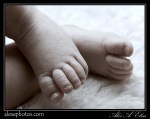
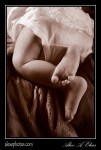
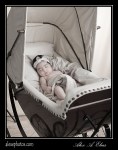
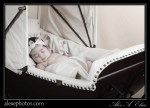
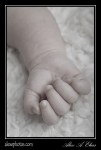
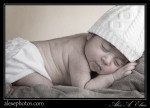
Newborn. Baby girl Pictures.

I just finished doing a shoot for a newborn baby girl. The session went great since the little one literately slept like a baby.

The set up was quite simple, I used a photography posing table to set the basket with the baby, that made it easy for moving and positioning. The lighting was done with 2 Travelites 750 one with a 11″ reflector set with a 30Deg grid  for the background and the other one with a larger Photoflex softbox that was placed very close to the baby on camera’s right. On the left side of the camera as a fill light I used a Canon 580EXII with a 2×2 Lastolite softbox . All lights were triggered with Pocket Wizards Flex TT5 and a Pocket Wizard mini TT1 with the AC3 controller on the camera as the master. The camera was a Canon 7D and the two lenses for this shoot were a Canon Ef 100 macro F2.8 and as Canon Ef 24-70 f2.8L. I used the 100 macro 90% of the time for the session. I set it at  f5.6 since I was looking for a rather shallower DOP.

For the post work I used Adobe Bridge to organize and tag the files with colors and stars. From there I migrated the raw files to ACR to do some  adjustments and then open in Photoshop CS5 to do the last part. Here I did a few different styles in terms of post work from color, to black and white, duo tones and playing with vibrance  and saturation tools.

Thanks for looking.

I welcome questions and suggestions.

Alex Elias

Las Vegas Trip. Photo tips. Part two

On the first post I mainly talked about the equipment that I took with me and a little bit about exposure compensation. Here I will go over a bit more about some of the setting I normally use.

As I mentioned on the first part, in my opinion the only three settings worthwhile using are the ones that gives me full or most control over the creative process and those are.

Aperture priority. AV for Canon and A for Nikon shutters. When shooting in this mode one can choose the f stop and the camera will select the correct speed for the aperture you selected. This setting will let the shooter decide how much from foreground to background is sharp. The higher the number, the greater the portion that will be within acceptable focus. Having a large area in focus might be what you are after if you are shooting landscapes, on the other hand, shooting outdoors portraits normally benefits from a shallower focus (narrow depth of field) therefore selecting a lower number and blurring the background might be the way to go.

Speed priority. TV for Canon and S for Nikon shutters.This setting does the exact opposite. It let you choose the speed needed while the camera choose the correct aperture for selected speed. When taking pictures of kids playing in the park, sports etc, one wants to set the camera to a speed that can stop the action. If you are shooting landscapes and there is a river with a beautiful waterfall for example, then you might prefer to have a low speed to capture the movement on the water.

Manual. M for Canon and Nikon shooters (one of the few things they agree on) This is the one setting most people fear to even touch and is the one that let’s do take full control over your camera. Here you select the right combination of both speed and depth of field.

With that in mind, depending on what I’m photographing is which of the three settings I will use. If I’m dealing with architectural things like city buildings and other stationary things, most likely I’ll be shooting in manual mode, if I’m just walking around waiting for something to happen or just jutting away to nothing in particular chances are the camera is set to AV.

White balance. Cameras now days have quite a few predetermined setting for different  kinds of lightning. Automatic white balance is the most common if one is going to be walking around. Unless you are in a place where the color temperature is constant Auto is the way to go.  The cloudy setting is pretty useful also when shooting portraits outdoors, even if it isn’t cloudy since it will warm up the scene a bit but the skin tones on people will look a bit better as well.

Focusing points. Majority of modern cameras will come with a cluster of focusing points on the screen. Many people select all an let the camera set focus on either one of them (big mistake) many times the camera will choose to focus on the part of the frame that wasn’t what you wanted. At the end of the day you’ll be asking yourself why so many pictures are out of focus. If you can select a specific one do yourself a favor and select just a single one, every time you aim at your subject with that point you know that that the camera will lock the focus right on that spot.

Raw or J peg. Why not both? If you already spends hundreds on equipment, spend a few more dollars and  get more memory cards if space is your concern. I always set the camera to shoot the largest RAW and small J peg’s. I rarely use the J peg files  but if I want to share the pictures quickly with someone I can download those pretty fast.

Hands down the RAW files will beat J pegs every time when it comes to amount of info, plus the camera presets such as sharpening, contrast, saturation ETC are no embedded on the file. You will be surprised the amount of data contained in the RAW files, also iIf you have over/underexposed files, wrong color balance and some other errors RAW is the best way to recover.

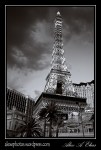
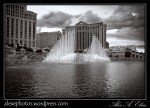
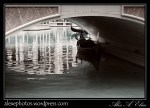
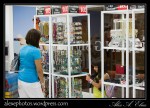
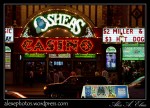
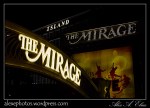
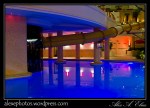
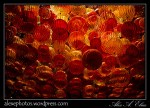
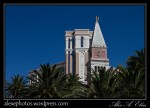
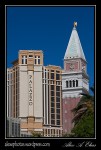
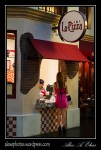
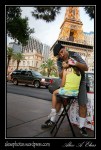
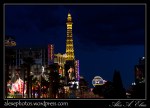
Here are some more images from Vegas.

As always, thanks for stopping by, and I welcome comments, questions or ideas.

Alex Elias

Las Vegas trip. Photo tips and equipment selection. Part one.

I recently went to las Vegas with the family. We spent most of the Saturday walking around the strip and visiting some casinos. For that Saturday I loaded a Lowepro slingshot 300AW with a Canon 7D, Canon BG-E7 battery grip and 3 lenses. Canon Ef-s 10-22  Canon Ef 24-70 f 2.8 L and Canon 70-200 f 2.8 is L I also took a Canon 580 EXII for fill light, a Manfrotto 2021 tripod with a Manfrotto 498RC4 ball head. Last but not least a circular polarizer, spare batteries and memory cards.

Lens selection

There is always two sides of a story. If you are looking for the best image quality you will take primes with you. If you don’t want to be changing lenses too often or don’t like zooming in and out via your legs then a zoom will be the ticket. I had coverage from 10 to 200mm between the three lenses I took. If you wonder what one or two lenses are most suitable/ useful for a day like this the answer of course will be;  it depends on your style. The Canon ef-s 10-22mm is a very good and fun lens to have but too short to be the primary lens. The Canon ef 70-200 f 2.8 is L is a fantastic lens, the one thing though, is that after hours of holding that rig around it becomes pretty heavy. The image quality is fantastic, it gives nice images from the distance and some great close ups and tight portraits. The Canon ef 24-70 f2.8 L  had the most useful range for a walk around lens.

From that day kept 370 pictures and here is some data I pulled from those images.

Out of the 370 pictures 324 were taken with the Canon ef 24-70 f2.8 L 26 pictures with the Canon Ef-s 10-22  and 20 pictures with the Canon ef 70-200 f2.8 is L. The one thing to note is that some times I get lazy and I don’t swap lenses when I think I should. To help prove my point here is a bit more data. From the 324 images I got from the Canon ef 24-70 f2.8 L 89 of them were at 24mm and 57 at 70mm, nearly half the pictures taken with that lens were taken at either end. Based on my experience, if I can only carry one lens (from what I own), the Canon ef 24-70 f 2.8L would be the one. One other lens to consider, is the Canon ef 24-105 f4 is L but it seems like that would be a fantastic lens to own for something like this. Now If you are going to shoot prime lenses only, my first choice would be a 24mm second choice a 35mm and third choice a 50mm.

Shooting Mode

Shooting in manual mode always gives you the most control and creativity, at the expense of loosing great pictures along the way while playing with the settings. I enjoy shooting in manual mode as much as possible, but when walking around  in a place that exposures changes every step of the way I rather switch to a mode like AV, or TV and let the camera do the heavy lifting for me. In this case AV was my choice for 80% of the day; whenever it made sense to choose manual I did.

Exposure compensation

This is a feature of the camera a lot of people either don’t know what it is, or do know why they should use it to begin with. To me, this is the one function of the camera that let the user set an automatic mode such AV or TV and still be creative and have control over what the camera is doing.

The main reason reason why this should be use more often, is due to how the camera’s meter is design to work. Without getting into lengthy explanations of a meter system, cameras are set to see the world as neutral grey, AKA 18% gray. Therefore if you take a picture of a white wall, the camera will assume that the wall is meant to be gray and will shorten the exposure “underexpose” to make the wall grey. The exact opposite will occur if you take a picture of a black wall. The camera will give you a longer than needed exposure (overexpose) to make the black wall gray.

Once this concept is grasp, that is when one begins to use exposure compensation all the time, to complete the creative process. Go out there and set the camera to AV , choose an f stop that suits your subject; Do you want a nice portrait with a blurry background? Open up the lens all the way. Is it the place a bit dark because your subject is on the shade? Use a higher ISO. Once the camera have 2 of the 3 variables “in this case an f stop and ISO” the third value is chosen by the camera, in this case the shutter speed.But… What would happen to your portrait if a good portion of the frame is going to be a bright blue sky? Well, chances are the camera will expose that sky properly leaving you with the portrait of a lovely black silhouette. If that is what one was looking for, then great, but if you were not going for the silhouette effect that was when you needed to overexpose via exposure compensation to have a proper reading of your main subject. In a nutshell this is how you can use some semiautomatic setting but still have control over what is going on as supposed of the camera doing all the thinking for you.

Thanks for stopping by.

I welcome, questions, comment and critiques.

Here are some random images I got from that day.

Still photography and feathering the light

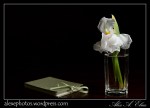
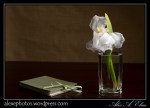
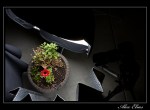
My 3 Yr old son decided to yank this flower from the plant ( along with 12 other of it’s kind ) Since he go every flower with had there I wanted to at least have a picture of one before it die.

The backdrop I used was a piece of burlap that I thought it was going to work well. After a few shots I realized I did not liked the backdrop at all and started to pull it back to make it darker due to light fall off. Next thing you know I run out of space and I was able to still see the burlap pretty clearly.   After a few tries I figured that pulling the light farther away did help the background but the flower went darker in the same relation, so I went back to the original light position, added a black back drop and changed the angle of the light and that did the trick. Basically the light was not aiming directly at the flower, it was position in a way were the light traveled in front of the flower from right to left therefore feathering the light  it created a beautiful wrapping light that brought the flower back to life and added some depth and contrast.

Equipment Used.

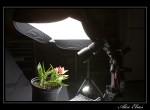
Canon 7D with Canon Es 24-70 2.8L the camera was set at ISO 200 F5.6 I used one travelite 750 with a 36″x48″ Photoflex soft box (I did not need such a large box for this but it was up on the stand already) the light was triggered via Pocket wizard.

This is the end result

This picture was with the original set up.

And this two images show the light in relation to the flower.

Outdoor Family portraits

I haven’t posted for a while. Life has kept me busy with good things plus I was practicing a bit on my procrastination.

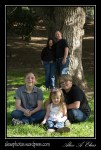
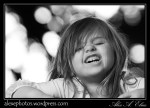
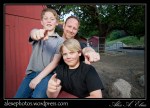
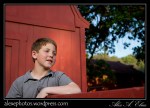
Here are some pictures I just I took at the park. I could not have asked for a better day and and nicer family to work with, the kids were awesome and everything went just right.

The equipment I used:

Camera was a  Canon 7D. The main lens was a Canon EF 24-70 2.8L  follow by Canon EF 70-200 2.8  IS L  and I took a few using a Canon EF-S 10-22 . As far as lighting I took two Canon Speedlite a 580EX II and 430 EXII with 1/4 CTO on each one 1 2×2 loastolite Easybox  and a 5’x3′ reflector/difuser. The flashes were triggered with one Pocket Wizard Mini TT1 and an AC3 controller and 2 Flex TT5. Using the AC3 controller is nothing short of great, I had one light in group A the other one in group B and controlled each one at will from power up and down to turning on and off or go from E-TTl to manual. They are pricey but they are great.


Self portrait.

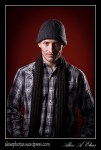
I just got two new color backdrops (bright orange and blue) and wanted to give them a test drive to see what they look like in real life. When I got home the only available live subject that doesn’t mind being photographed for about an hour was me so here it is.

I wanted to darken the bright orange to look deeper. I set the background about 6 feet behind me for the light to fall off quickly.  The main light was a Travelite 750 with a 2×2 Lastolite Easy Box I wanted soft light but not as soft as the 4×6 Photoflex softbox I was thinking of using at first ( the lastolite being a lot smaller and silver inside has a more punchy light) as a secondary light (edge light) I also used a Travelite 750 with an 11″ reflector and a 20Deg  grid for a very harsh and directional light, later on I added a third light for the background and that was a Canon 580EXII that I fit with a small snoot to have a bit of direction.

The main light was on the left side besides me not quite at 90 deg to the camera but way past 45deg  (almost like side lighting) and aiming down at about 45deg. The second light (rim light) was on the far right side behind (make sure when you place this light it does not create glare) I got both lights set to F11 the camera is my Canon 7D with the Canon EF 24-70  2.8 L  ISO 100 and the white balance was set at 5800K.

The one picture I’m pulling my Vampire tooth was shot with a Canon EF-S 10-22 the lighting was the same but the backdrop was a lot closer to me.

PS: for the profile image is best if the subject is not sitting right in line with the center of the light source. Use the edges better. 

Thanks for looking

Alex Elias

Photo of the day. Portraits with Canon 7D

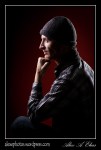
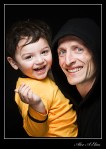
Yesterday I took some pictures of my little one and I ended up including my self for a few as well. I used a Canon 7D mounted on a tripod and a remote release to shoot it. The lens was a Canon 50 mm f1.4 I set the lens to manual and to aid me with the focusing I placed a stand where I was going to be sitting. The camera setting where at ISO 200 f7.1 (to allow some depth of field since I was not behind the camera to focus) and speed at 250th to keep the background black.

The lighting was done primarily with one flash and later I added a second one. The main light was a Lastolite Eazy Box 24″x24″ with a Canon 580EXII set at half Power. The soft box was on a boom hanging right above my forehead pointing down at 45 Deg and when added the second light this one was on an umbrella (reflecting) right in front of me. It was set low to the ground pointing up 45deg to my face. The second light was a Canon 580EX set at 1/8th power. The light were triggered with Pocket Wizards Mini TT1 and Flex TT5.

.

Photo of the day. Macro photography flowers part 2

I wrote something about macro and close up photography a while ago here https://alexephotos.wordpress.com/2009/10/25/macro-photo-of-the-day-feathers/  this talks about the set up I used to take pictures of feathers. The ABC’s are the same.

Tripod is almost a must first for the obvious reason of steadiness and second to find the composition that better suits your eye and third so every thing remains the same if you like to play with the lights to get different effects, so a tripod is paramount for this kind of images.

Use the mirror lock up function if your camera has one (it helps reduce or eliminate vibrations created by the mirror when it flips up)  If you don’t know if your camera has that feature or not this would be a good time to get something call owners manual, it’s a little book that came inside the box and most likely was tossed aside 🙂 if the camera does not have a mirror lock up feature use a self timer.

Cable release or wireless trigger also helpful to reduce vibrations.

I used a Macro lens Canon EF 100mm 2.8 but it is not a must if you don’t own one work as close as the lens will let you. There are some accessories one can use as well such as close up filters, or extension tubes to increase the magnification.  Now that we are mentioning the lens it is best to focus manually to get the best possible focus and use a small appeture with ironically is the larger number this images were taken at  f20 although this will add to the Depth of filed it might not be the best f stop due to something call diffraction, f11 to f16 depending on the camera and lens could be safe.

As far as lighting  I used mainly one Canon 580EXII on a stand with a 24″x24″ lastolite soft box. The flash was trigger via  Pocket Wizard Mini TT1 on the camera and a Pocket Wizard Flex TT5 on the flash. The flash was set to manual (find your own exposure and flash distance to subject) and shoot away.

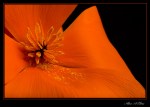
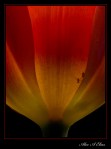
On some of the pictures of the Poppies you’ll noticed I used 2 Flashes, the main one and on the center post of the tripod I attached at second unit (Canon 430EXII) also in manual mode connected with a Pocket Wizard FlexTT5. Since the poppies are rather thin I wanted to see how it would look like with some light coming from behind the petals.

Reflectors could be helpful to fill in shadow areas on the opposite side of the main light, depending on the look that you are after and the lights available to you, a reflector allows you to shoot with only one light. Even if you don’t have any lights available, place your subject next to a window with diffused light coming through and use the reflector on the other side.

I shoot this pictures with a Canon 7D set to manual mode. the speed was set at 50th of a second (although I’d recommend 250th) I guess I was not paying enough attention when I did my set up shame on me 🙂  ISO for most pictures was set between 100 and 200 and for a few where I needed more light instead of cranking up the flash too much I gave the camera a way to go with a 400 ISO (that is one way to conserve a bit of batteries and get faster recycle times) not that is so important for still photography to have a fast recycle time anyway.

Here it are some of the pictures along with pictures of the set up.

Thanks for reading this and don’t hesitate to comment, ask questions of post your own experiences.

Regards,

Alex ELias

Portrait and lighting effects.


I received my mew model on the mail a few days ago (a $29 female head and shoulders plus $15 brunette wig) her name is Niky and today I shot a series of pictures showing the effects of light placing.

First I took a picture of the whole set up showing where the light was in relation to Niky and then photographed her 3 times using that set up.  The first picture shows only the light with a gold reflector, next image is with a silver reflector  and no reflector on the last picture. Then repeated the process every time I changed the location of the light. This will show what one can do with just one light. I might do the same later with 2 and 3 lights but I figure this can be useful for someone starting out in a budget.

  This post is not a lighting class by any means, it’s more like an aid. The first pictures are taken at 90 Deg to the left of Niky (our right ) and then I worked my way around to be right in front of  her face and also one series of pictures is right from up above her head. The pictures taken wtih the second flash as a hair light should be taken with either a grid or snoot or some modifier since they are to harsh for my taste, also the one with the flash on the camera lower right is perhaps not the best location (hight wise) I like the ones with the flash on camera top left corner better. 

To keep things consistent the camera ( Canon 7D ) was sitting on a tripod, and shot with a cable release, the lens ( Canon EF 24-70 f2.8 L ) set to manual focus. White balance was fixed at 6200K. The flash ( Canon 580 EXII ) was set to manual as well and kept at the same distance on the different lighting settings. The soft box used is a 24″x24″ Lastolite Eazy box mounted on a Manfroto stand and an avenger boom, the flash was trigger with a Pocket wizard mini and a Flex. Last, to be kind with the flash I set the ISO to 800, f4 and 250 speed.

I sure hope this could assist someone, I wanted to do this for a while not only to share some experience with others but of course to learn more and practice. So far I can see that Niky has no chance against a person but you can’t beat it for staying still and not blinking while shooting. It is a great tool to practice a number of lighting effects, best $50 I spent in a while.

Regards

Alex Elias
 PS: Comments, questions or thoughts are welcome and appreciated.